Before progressing to the more exhausting tutorials, which eventually demonstrate some of the more advanced features of both TINE clients and TINE servers, you can go through the following steps to get a feeling for some of the basic features, tools, API calls, etc.
Step 1 (download) :
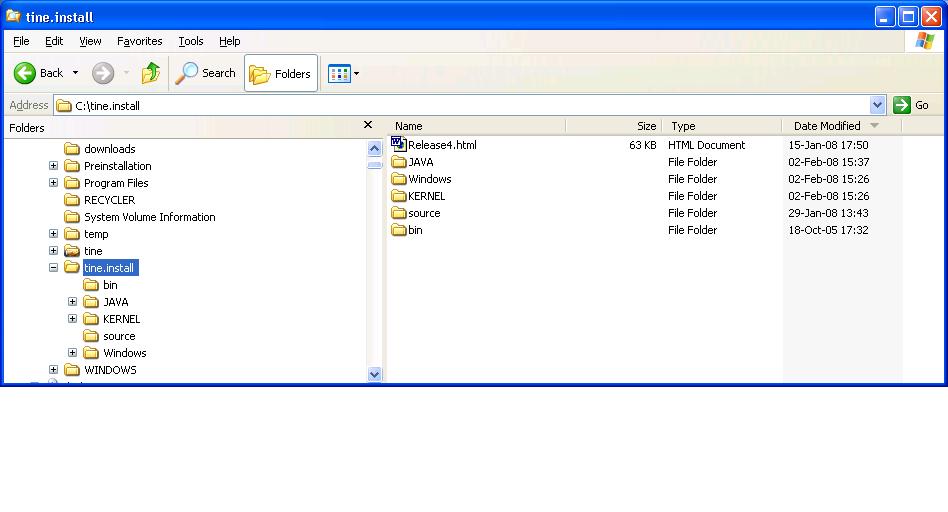
First, download the TINE distribution for Windows. Also download the java distribution, as we will make some simple java clients (without writing code or using a java IDE!). Unzip the tineWin32.zip and the tineJava.zip files into your preferred location. Let's say that you have chosen to unzip everything into C:\tine.install. So your C: drive might look something like:
Step 2 (installation):
In the Windows distribution, the executables are already compiled, linked and ready to go. But nothing is as yet 'installed'. In general, a site administrator should download the tine distribution to a central location accessible by all. Individual users would then map a drive to the central location and run the setup batch script. In this tutorial you are the site administrator and the 'central location' is your machine! The next thing to do is to edit the location of TINE Equipment Name Server (ENS) prior to setup. You do this once as a site administrator by running the Setup1st batch script. CD to C:\tine.install\Windows and type 'setup1st'

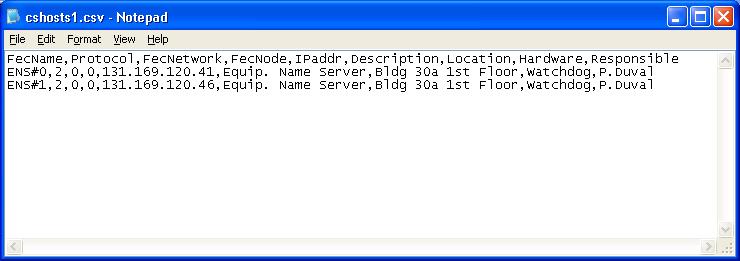
This will open up the cshosts.cvs file in notepad. This file contains a list of the tine equipment name server(s) (ENS) running at your site. The file which pops up is a copy of the cshosts.csv used on site at DESY. You should replace the ip address it contains with the ip address of the tine equipment name server(s) for your site. Right now you don't have one! You will soon. And for this tutorial, we will work 'inside-the-box' with one local instance of the ENS.
So either put the address of your host machine in this csv column or use the loopback address, 127.0.0.1.
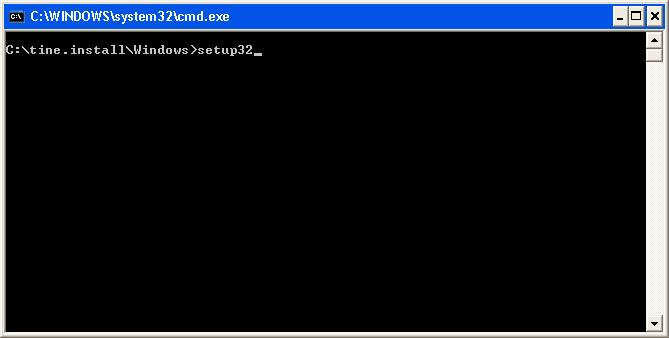
Now run the 'setup' batch script by going to C:\tine.install\Windows and typing 'setup32' inside a command prompt.
This will essentially put the relevant copies of libraries and executables found in c:\tine.install into a directory called C:\tine. Several ActiveX controls will be copied into the System32 directory of your Windows directory (if they are not already there and are not younger than the source). It will also put C:\tine\system32 on your path and put serveral startup links in the start menu and substitute the drive 'L:' for 'C:\tine'. We'll be trying some of these applications out in a while, BUT BEFORE WE DO you should start an instance of the equipment name server.
The setup script has also set the environment variable 'TINE_HOME' to C:\tine\database, which is the location of a local copy of 'cshosts.csv'. This local file contains the ip addresses of the equipment name server (ENS). If it is missing, a TINE application will try to determine the ENS address by asking the Domain Name Server for the ip address of a host called tineens on the local domain. Your domain will certainly not have such an entry at this stage of the game!
Step 3 (The Equipment Name Server):
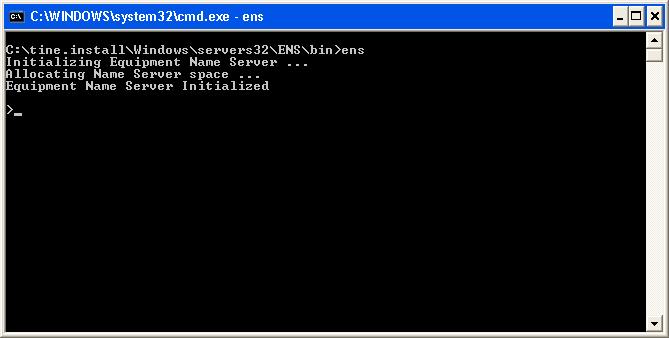
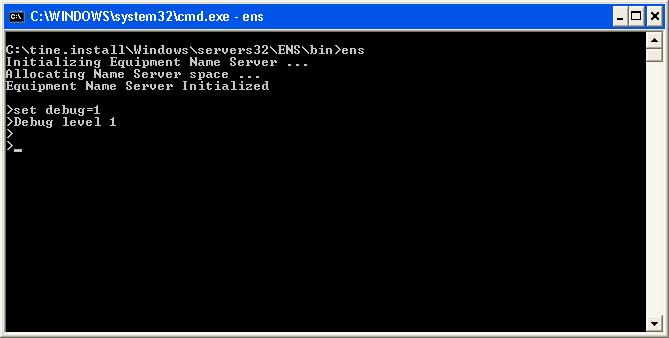
Go to the C:\tine.install\Windows\servers32\ENS\bin directory and start the Equipment Name Server (ENS) by typing 'ENS.EXE' inside a cmd shell (or just click on the executable from the windows explorer).
We won't start it as a service as we will want to examine the screen output as we move along. Later we can see how to do the same thing when a server is in fact running as a service. At the command prompt of the ENS type 'set debug=1'
So far this is the only TINE server running at your 'site'. It is of course a very special server and is found in the TINE context "SITE".
Step 4 (The Instant Client):
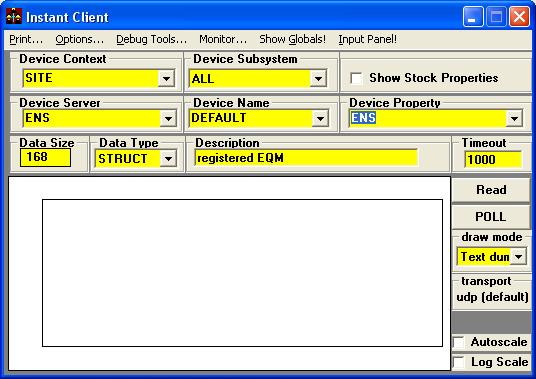
Now start the Windows 'Instant Client' from the start menu. You should notice some output on the console screen of the ENS, namely the Instant Client has asked it for the list of available contexts and servers. At this stage it got back a list of 1 context "SITE" containing a single server "ENS". And you can browse its 'properties' and 'devices' with the Instant Client. The Instant Client will also display, in addition to the registered contexts, a de-facto context called "DEFAULT", which is in effect equivalent to 'no context specified'. If a device server name is otherwise unambiguous, you can thus access it without specifying the context. For our present case if you select context = DEFAULT or context = SITE you will see the same servers. Note: as we started the ENS from scratch, it created its initial database with itself as the only entry.
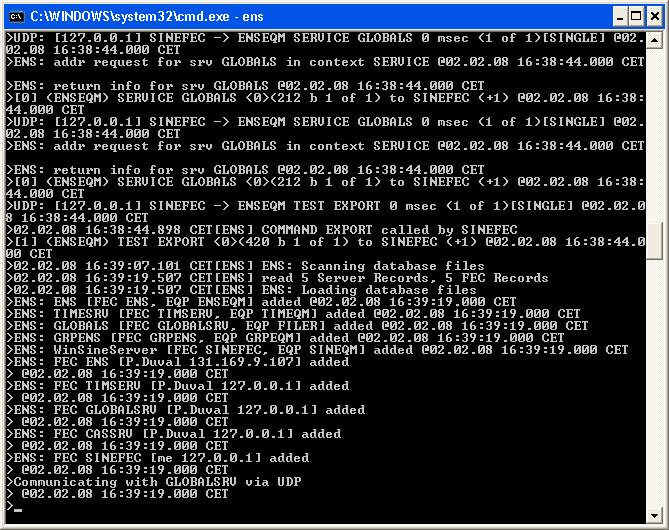
If you select some of these device server entries and have a look at the output on the ENS console you will see some activity (as we have set the debug level to '1').
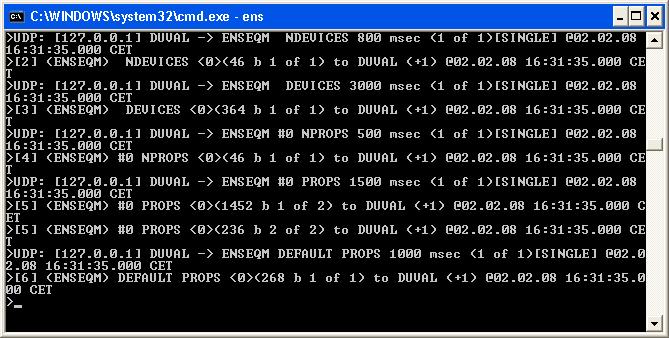
This reflects the fact that by selecting a new server, the client program (the Instant Client) must acquire the server's address and it goes about this by asking the ENS. The address is then cached locally. When you select the server call "ENS", you then ask it specifically for its properties and devices. Hence you will also see output at the console in this case as well.
This is all not really very interesting at this stage, so let's start a real server.
Step 5 (The Sine Generator Server):
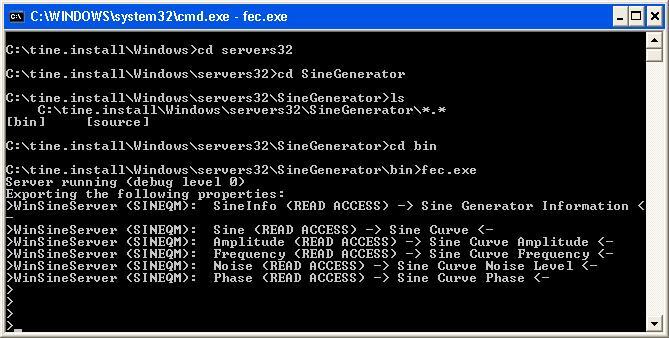
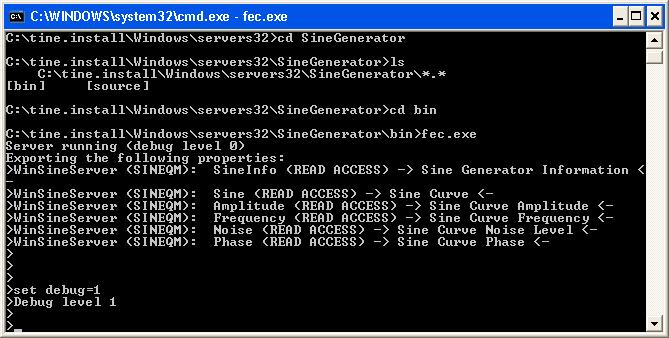
In another command shell, go to C:\tine.install\Windows\servers32\SineGenerator\bin and start the Sine Generator Server by typing 'fec.exe'
'FEC' is an acronym for Front End Controller and you will frequently encounter it in various circumstances.
When the Sine Generator starts, you should see more output on the ENS screen. Namely, this new server has 'plugged' itself into the system by informing the ENS that it is starting. It will try to register itself as a new device server called 'WinSineServer' in a context called 'TEST'. If you have a look at the ENS console you will see some of the 'plug-and-play' activity on the screen. In the end, the new FEC and device server are accepted (as there can't be any name conflicts at this early stage) and the ENS updates (and backs out to disk and re-reads) its database.
This Sine Server is another 'console' server just like the ENS itself so you can set the debug level to 1 (or higher) in the same way here.
Step 6 (Accessing the Server with the Instant Client):
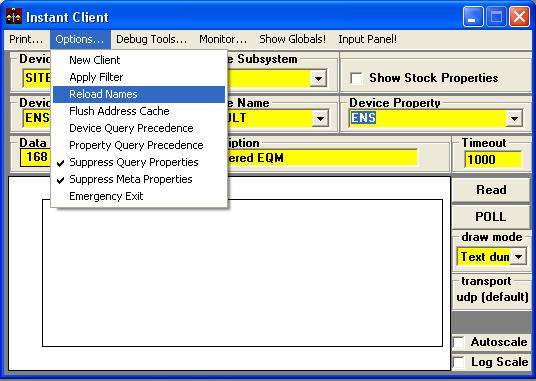
Find the new server called 'WinSineServer' in the instant client. You won't be able to find it immeadiately, because it's new. So go to the options menu of the Intant Client and click on 'Reload Names'.
Now you should see a new context called 'TEST' with a single server called 'WinSineServer'.
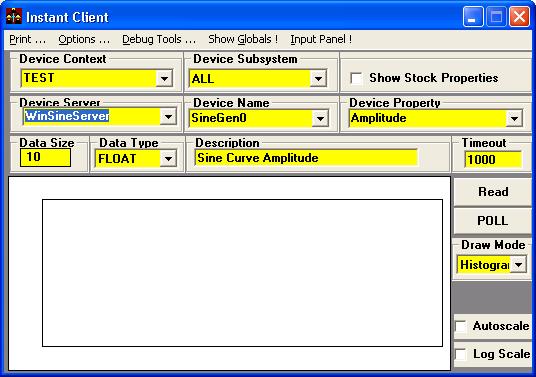
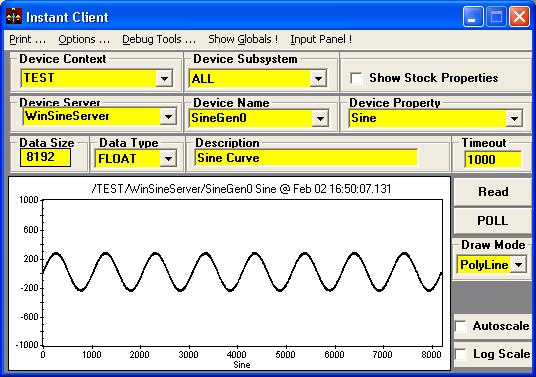
You can access any of the properties shown and see what they do. There are 10 instances of a sine curve, given device names 'SineGen0' through 'SineGen9'. Each has properties 'Sine', 'Amplitude', 'Frequency', 'Phase', 'Noise', and 'SineInfo'. The property 'Sine' is a read-only 'Spectrum' type property (or WaveForm or Trace, if you prefer) and naturally displays itself as a polyline trace.
The properties 'Amplitude', 'Frequency', 'Phase', and 'Noise' are read/write Channel type properties. This means you can read all or a subset of the amplitudes with a single call. If you ask for more than one amplitude, the selected Device Name gives the starting index, and the results are 'naturally' displayed as a histogram (whose x-axis indicates the individual devices).

You can override the display mode in the instant client by selecting any of the modes offered in the Draw Mode combo box.

Step 7 (A Simple Client Application):
Let's try to make our own client application.
To do this you'll need to have java TINE installed. So cd to C:\tine.install\tine\java and run the setup script, setupWindowsJava.bat. Note that the TINE applications which are installed by default require Java version 1.7 or higher.

This should copy the relevant files to the C:\tine directory (inside a java subdirectory) and put some more startup icons in the start menu.
If you open up the startup icons, you should see reference to the Container Object Manager, (COMA). Start this application by clicking on the icon.

When the application starts, you should see nothing but an empty frame:

You can strech the frame to some size that you like, so make it a bit bigger, and then enter 'EDIT' mode by holding the CTRL key down while you press the right mouse click button somewhere over the empty frame. You know if the key events were accepted properly if the mouse cursor becomes a 'hand' and the application's caption appends '[ edit mode ]' to the title bar. If you then (while in EDIT mode) click the middle mouse button (or your wheel, if your mouse has a wheel) you should see a menu containing possible acop beans to add to the application. Note: The processing of click events is some times tricky here, so you might have to click the middle button a couple of times to entre EDIT mode.

Add a 'new ACOP' (which is actually an ACOP chart control), a 'new Dial Knob', a 'new Slider'. These are all 'ACOP' beans (ACOP stands for Advanced Component Oriented Programming). Leave EDIT mode, the same way you came, i.e. CTRL + right mouse button.

Now you've got some graphics on your application, but they don't, as yet, do anything. The magic of ACOP beans lets you browse and connect them at run time (as well as as design time), so position the mouse pointer somewhere over the chart and issue a right-mouse click. You should see an option menu appear.

Choose "Preferences", and a property 'customizer' for the chart appears.

From among the options appearing on the left side panel, choose 'Connections' and you should see a browser panel appear on the right hand side. Find the property "Sine" for the Sine Generator by selecting context "TEST", Device Server "WinSineServer", Device "SineGen0", and finally property "Sine". You can leave everything else as it is and click on the 'Add' button (note: you can have several active plots on the same chart, but we'll stop here). And then click close. The default Access Rate is 1000 milliseconds (i.e. 1 Hz), you can also set this to a higher rate if you want to see faster updates. The ACOP Access mode "POLL" means the polling rate at the server and that the server should send the data at each scheduled timer event. It does NOT mean that the client application polls the server!

Now move the mouse over the ACOP Dial Knob and issue a right-mouse click so as to bring up the popup menu and select 'Preferences'. The ACOP Dial Knob customizer should appear. Once again, select 'Connection' and browse your way to the 'Amplitude' property and click the 'Connect' button.

Before you select 'Close', select the 'Value Display/Advanced' item from the left hand panel, and make sure the 'editable' property is set to 'true'! Remember the property 'Amplitude' is also a 'settable' property.

We won't detail the procedure here, but you can follow the same steps above for attaching the 'Amplitude' to the ACOP Dial Knob in attaching the 'Frequency' to the ACOP Slider. Note: Make sure the 'connect' the property to the control. At the time of this writing, there is an intermittent bug in the run-time bean which tends to show 'editible' as 'true' when it isn't, so you might have to set it to 'false' and then re-set it to 'true' in order to send setting to the server.

You can save your 'application' by re-entering EDIT mode, issuing a middle button click and select 'Save' from the popup menu. The COMA application can take the saved file name as a command line argument in order to start up with your previous changes.
Step 8 (Command Line Tools):
You can open up a command prompt and test some of the command line tools, such as 'tget' or 'tmonitor', etc. Most of these tools are covered in the more advanced tutorials. But as a preview of things to come, open up a command prompt and type 'tget'. You should see a 'usage' text. Then try typing 'tget /TEST/WinSineServer/SineGen0 Amplitude'. If you do this, you should see 10 values returned, namely all amplitudes for the Sine Generator Devices beginning with SineGen0. To just get the single value for SineGen0, type 'tget /TEST/WinSineServer/SineGen0 Amplitude 1 float'. To get the value for SineGen1, type 'tget /TEST/WinSineServer/SineGen1 Amplitude 1 float', etc. Note that if you've followed the steps so far, your client application hasn't changed the values of Amplitude or Frequency at all for SineGen1 to SineGen9 from their startup values.

Step 9 (FEC Remote Panel):
You can sample some of the other applications that the install package put on your start menu if you'd like. For instance, select the "Remote FEC Panel", either the Java version or the windows native version. This will start up by querying the ENS for the available contexts and offer the available FECS (FEC View) or Device Servers for the selected context. Start, say, the Java FEC Remote Panel. It will Show the servers in context "SITE" when it starts, because we have so far, only two contexts, "SITE", and "TEST" and combo box selector is alphabetically ordered. Select context "TEST" and you will not at first see any servers to examine. That is because the WinSineServer belongs to Sub-system "TEST" as well, and the FEC Remote Panel does not show Sub-system "TEST" by default (the check box is not checked). So check this check box, and you should see the WinSineServer appear in the grid. You can then 'tab' your way around looking at the clients attached to the server (you are attach automatically via the FEC Remote panel itself), the current contracts in server's contract table, the server's log file, etc. You will not be able to restart or otherwise 'control' the FEC at this stage, as we have no control daemon running.

Step 10 (More Advanced Tasks):
We haven't coded anything so far, either at the server side or the client side. We have simply had a look at a Sine Generator Server, useful for testing client appications. And we have made a 'simple' client application using the Container Object MAnager (COMA) and ACOP beans. 'Rich' client applications are, of course, another matter and are taken up in the more advanced tutorials. The nice thing about building COMA applications is that there is no external 'framework'. The framework is 'built-in', so to speak. We did not start Eclipse, NetBean, or anything else in order to build the application. Indeed, we do not even need to know that it is a java application.
We'll leave java server applications for the more advanced tutorials, but you can have a look at the code used to generate the sine generator. Go to C:\tine.install\Windows\servers32\SineGenerator\source and have a look at the project. For historical reasons, the windows project was built with Visual Studio 6.0. You can use Visual Studio 2005 or higher to have a look at the project.
If you rebuild it with Visual Studio 2005 you will have to do the following: In the Property menu, Linker -> Input section, you should click on the empty field next to "Ignore Specific Library" and then input "LIBC.LIB". If you do not do this, Visual Studio 2005 will refuse to build the project.
The 'meat' of the server program is in the module sineqm.c (with corresonding header sineqm.h). As an exersize you might see how you would go about adding a property called "Attenuation", which would degrade the overall amplitude along the x-axis. This would be modelled on the 'Amplitude' property, namely it should be 'settable' for a single device and delivery a multi-channel array (if desired) upon read. If you're really feeling adventurous, you can add a field called 'attenuation' to the structure used in the "SineInfo" property. This is already fairly advanced, but the c-code here is not to hard to follow.
This simple server application is, as you see, written in straight c. You can also think about how you would re-write it in c++. This server application was NOT generated with the TINE Server wizard (another tutorial). You might want to use the TINE server wizard to try to reproduce the server code used here, i.e. to get an idea of what the Server wizard can do. One thing it cannot do yet, is to preserve user changes if the server wizard is re-applied to an existing project! (It does, however, make a backup of the previous code modules).